How to
Open: Customers > Credit Control > Run Customer Statements.
Open: Reports > Statements to... from the Customer List.
Print statements
Statements are generated for the customers based on the criteria entered. You can select customers by individual or range based on their code or account balance. For example, you may only want to send statements to customers who owe you more than a certain amount.
You can also choose which transactions to include based on their date.
Open: Customers > Credit Control > Run Customer Statements.
- Choose Send statements to printer.
- Select Retrospective if required.
- Click Run.
- Enter the criteria.
- Click OK.
Email statements
If the customer is set to use an email statement layout, then this sends statement to the email address specified on the customers account. The statement is not printed.
Before you can email a statement, you have to:
-
View the customer account and check that an email address is entered on the Contacts tab.

-
Choose an email statement layout on the Documents tab of the customer's account. Once a customer account is set use a email layout then the statements are not sent to the printer.

- To email statements, choose Send statements to printer and email.
Using the statement criteria
- Choose the customers to run statements for:
- Use the A/C Ref and Name to choose a single customer or range based on Code or Name.
- Use Balance to filter customers based on the balance of their account.
- Set the ageing periods date. This sets the start date for your ageing periods.
- Enter a date in the Base date for Ageing.
- Choose the transactions to include on the report. This includes transactions based on the date entered. This is usually the same as the Base Date for Ageing date.
- Choose To from the Transaction to show date drop-down list and enter the date.
Save statements to cloud document storage
You can set up Sage 200 to save customer statements to cloud document storage when you print (or email) them, so that they can be viewed by everyone.
Customer statements that have been saved to cloud document storage can be viewed in PDF format.
Open: Customers > Customer List, then select the customer and click View in Document Storage.
- The customer's folder is displayed in cloud document storage. The Statement folder contains statements for the customer.
See Save printed documents to cloud document storage.
Useful info
Choose which transactions are included on statements
This is set on the Customer Settings Processing tab. You can choose:
- All transactions - all transactions are included on the statement, both paid and unpaid. Use the statement criteria Transactions to show date to filter these.
- Outstanding transaction only - Only unpaid transactions are included on the statement. Use the statement criteria Transactions to show date to filter these.
- Outstanding plus all from a specified date - Shows both paid and unpaid transactions up to a date specified on the criteria. After this date only unpaid transactions are included. This sets Transactions to show date criteria to To by default.
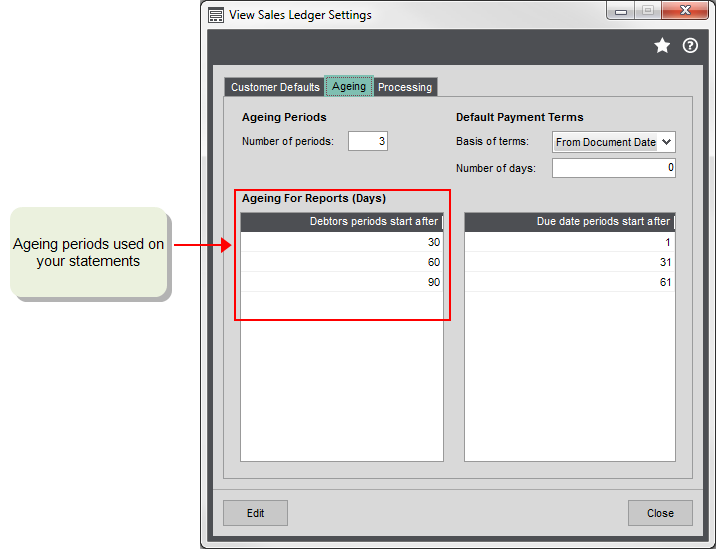
Choose how transactions are aged on your statements
The total amount due per customer per ageing period is shown on your statements and aged debt reports. How the Sage 200 determines which ageing period a transaction falls into depends what you've set in the customer settings and the criteria you choose when you run your statements and reports.
Age transactions by transaction date
Transactions are aged by time elapsed from their transaction date. For example, a transaction dated 01 June will be 30 days old on the 30 June.
To set this up:
-
Set the number and length of ageing periods on the Customer Settings | Ageing tab. The total amount due is shown per ageing period on your statements.
- Choose to age your transactions by Transaction date on the Customer Settings | Processing tab.
-
Run your statements and set the criteria for Base date for ageing and the Transaction to show date: To, to the same date.
This sets a start date to calculate your ageing periods and includes transactions up to the same date. For example, if you set this as 01 June, transactions dated from 02 May are current, from 02 April are in the 30 day period as so on (if your ageing periods are set to 30, 60 etc).
Use calendar monthly ageing
This ages your transactions based on the calendar month they are posted in. If you're using calendar monthly accounting periods and calendar monthly payment terms, then this makes sure that your reports and statements are consistent. For example, an invoice dated 29th May appear in the 1 month period on 01 June.
To set this up:
-
Set the number and length of ageing periods on the Customer Settings | Ageing tab. The total amount due is shown per ageing period on your statements. Set your payment terms to Calendar monthly.
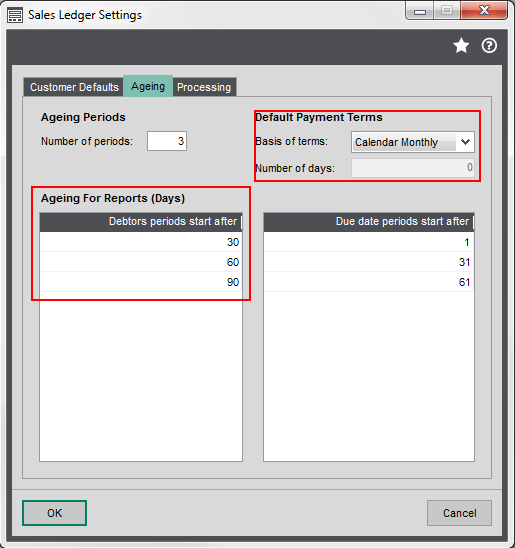
- Choose to age your transactions by Ledger Period on the Customer Settings Processing tab.
-
Run your statements and set the criteria for Base date for ageing and the Transaction to show date: To, to the same date.
This sets a start date to calculate your ageing periods and includes transactions up to the same date.
Age transactions by due date
This ages your transactions based on the date they're due to be paid. For example, an invoice dated of 01 June with a due date of 30 June will be 30 days old on the 30th July.
-
Set the number and length of ageing periods on the Customer Settings Ageing tab. The total amount due is shown per ageing period on your statements.
- Choose to age your transactions by Due Date on the Customer Settings Processing tab.
-
Run your statements and set the criteria for Base date for ageing and the Transaction to show date: To, to the same date.
This sets a start date to calculate your ageing periods and includes transactions up to the same date.
Retrospective statements
If you want to you can print statements at an as at date in the past. This ignores any transactions that were allocated after the Retrospective date entered for the statements.
To do this:
- Select Retrospective.
- Click Run.
- Enter the retrospective date as the Base Date for Ageing.
Statement layouts
Sage 200 has two default statement layouts that you can use ' out of the box'. These statement layouts are designed to fit the Sage stationery
You choose which layout you want to use on the customer's account.
You can customise these layouts using Report Designer.
What happens when I
Print and email statements?
All email statements are either sent to your email Inbox for you to check and send to customers, or they are sent immediately. This depends on your email settings in Report Designer.
Other statements are sent to the printer, preview, or spooler; depending on the Output mode you have set.
Print statements?
Statements are sent to the printer, preview, or spooler; depending on the Output mode you have set.
Statements are not produced for customers using an Email statement layout.
Steps in this task